I got out my crafting supplies!!!!
(Patrick loves it when I drag all my boxes and bags of crafting supplies onto the living room floor and get messy, leaving my scraps scattered for days and whining when one of the dogs take off with my ball of yarn and unravels the entire thing under the bed, while refusing to take the blame for it. He just lives for it.........not really, if you could imagine.)
So I have been itching to make a yarn wreath for a while. Nothing says, "Welcome to our cozy home, feel free to admire my craftiness," like a homemade yarn wreath!!


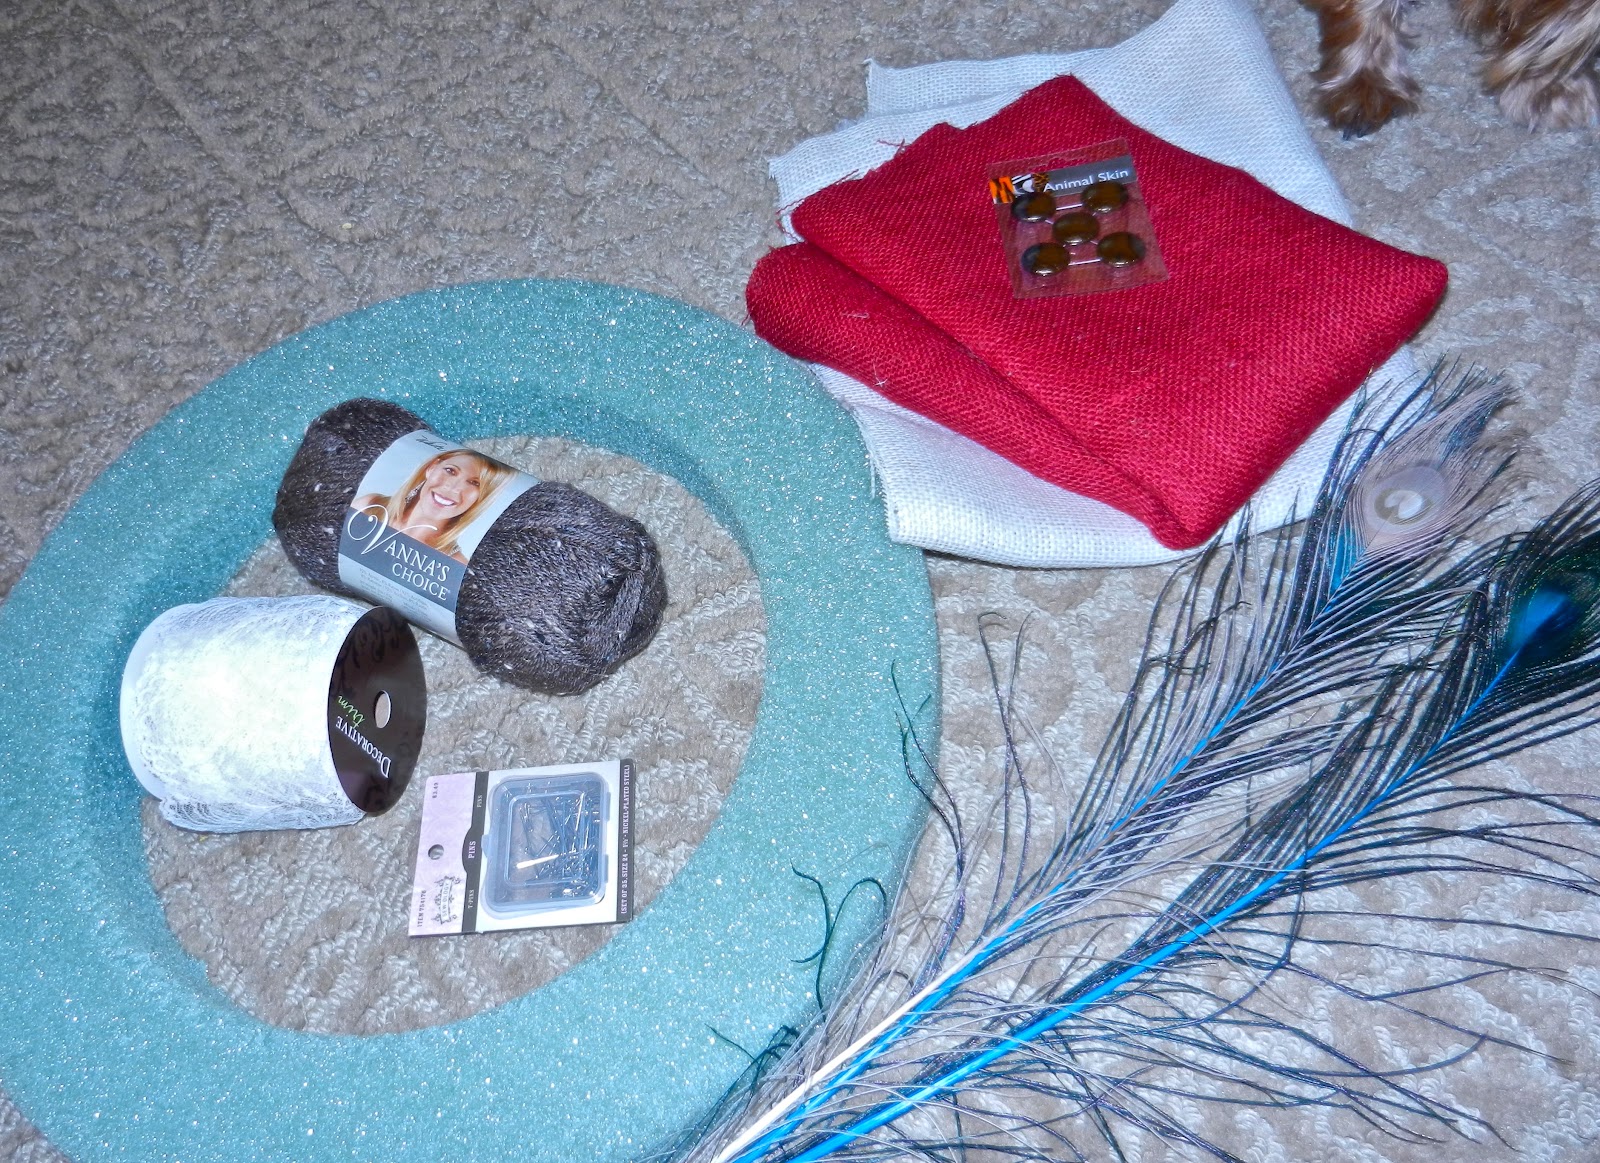
Here's what you'll need to get started:
- A wrap-able wreath (You can use straw, but I chose foam that is flat on each side because (1) it would fit perfectly between our entry door and glass door, (2) the foam is a more even, flat surface with a little bit of stickiness to it, to hold the yarn in place better, and (3) I thought it'd be easier to change designs with it, as I'll explain later.)
- Your choice of yarn (It actually took 1.5 rolls of yarn, good thing I always buy too much! Remember, the thinner the yarn, the more wrapping to do!)
- Scissors
- Push Pins (I chose the T-shaped kind so I could find them easily when I wanted to rearrange things.)
- Whatever embellishments you choose to decorate your wreath with (I chose burlap and buttons, to make vintage flowers, a few feathers I got on sale, and lace ribbon to tie in bow.)
If Making Your Own Burlap Flowers:
- Burlap (Color of your choice, you can be the messiest with the pale cream color, because the glue gun work doesn't show.)
- Glue gun
- Scissors (You're going to struggle hard core if they aren't sharp.)
- Buttons (optional)
- Need and Thread (if using buttons)
- Dog paw not required for either project

The less perfectly the yarn is aligned, the better, so I stretched out a couple of inches from my solid yarn, fill in the space by speratically looping it snuggly around the wreath, then repeat until you meet your starting point.
When you are finished, just tie another not in the yarn, the same way you started.

I hot glued some burlap flowers (deciding against using the red, because it started to look like 4th of July decorations), the more rugged the better, then strategically pined them on with the T-pins. If I didn't like how it looked, I pulled out the pin and started over.
Burlap Flower Version 1:
Cut a 3-4 squares of burlap, you can make them as big as you want your flower to be.
Take a square and fold in half, corner to corner.
Fold that in half.
Fold that in half again.
Cut the big end in a curved shape (it will kind of look like an ice-cream cone.) Repeat with each square.
In one square, make a cut in the crevice of a petal and stop at the center of the flower. Piece the flower back together and glue it in place.
In the second square, cut out a whole petal, stopping at the center of the flower. Piece the flower back together and glue in place.
In the third square, cut out 2 petals, stopping at the center of the flower. Piece the flower back together and glue in place.
Leave one square untouched.
Place all the flower pieces on top of each other, in ascending order and secure together with needle and thread.
Then sew on the button!
Burlap Flower Version 2 (works great with fabric too!):
For a 1 inch tall flower, cut a strip of burlap 2 inches wide and about 24 inches long. (This is not an exact science, it could be longer, or shorter if you like. Cut the fabric wider for a taller flower.)
Fold the burlap in half length-wise and start rolling and gluing.
Keep rolling and gluing until the entire strip is......for lack of better words, rolled and glued.
Don't be scared of all the frayed pieces, it adds character to your flower!!
Burlap Flower Version 3 (works great with felt too!):
Cut a large circle, diameter roughly 4 inches. (Again, the bigger or smaller the circle will determine the size of your flower.)
Then cut into the circle, spiraling your way in, until you reach the center.
Start winding the strip together in it's nature curved nature, layering each outer layer a little further out than the last and gluing it in place.
Glue the last little tail to the bottom of the flower as a base.
Leave as is, or glue a button in the center!
Burlap Flower Version 4:
Do exactly like Flower Version 2, except twist and turn the fabric, playing with it's length and shape, while gluing it.
To be honest, I'm far too lazy to take you step by step with with flowers by pictures, because it would take about a million.....and there about a half trillion ways to make them, depending on the style you're wanting to create, and the time you're wanting to invest. I'd be happy show anyone in person, but until then, here are a few sites that aren't as lazy as me!!
Snug as a Bug Baby
Craft Aholics Anonymous
La Belle Bride

Then I tied a lace ribbon bow around the wreath and put it out for the world to admire!!!
(So you see why I used the T-pins, right? So I can add and remove embellishments as I please to change the scheme of the wreath. It's called getting the most for your time and money, baby!!!!)
Have you done anything creative lately?