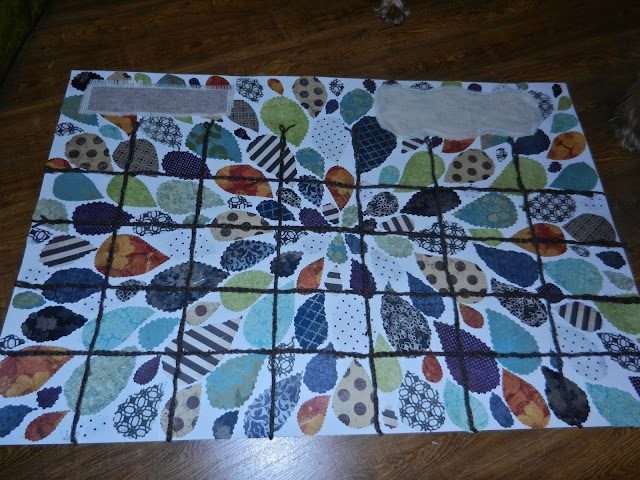
Back when Cousin A was visiting, she asked me to help her come up with a poor-student-friendly idea for a XL dry erase calender to write her ever changing school schedule on. After some deliberation, we decided using a large picture frame would be the cheapest route and allow for the most creativity, so we hit up Hobby Lobby, used our 40% coupon, and walked out with a 24x36 frame for $20. All the other supplies were lurking in my crafting boxes, free of charge.
Supplies:
Picture frame
Scrap book paper
Scissors
Glue stick
Yarn
Felt
Burlap
Hot glue/gun
Directions:
Remove the "fake picture" paper insert from the frame and turn it over so you have a nice, large, flat, blank slate to work with.
Decide on a background design (get as creative at you want), cut out your scrapbook paper accordingly and glue stick it to the blank slate, which we'll now call our design platform. (I would really stick to more neutral colors than this, as not to distract from the dry-erase writing you'll be doing later, but Cousin A wanted color.)
Measure enough strips of yarn (in groups of 3) to grid out your calendar, making each strand a few inches longer than the length and width of your design platform.
Tie 3 strands of yarn together and braid all the way down, then knot off the end. Do this again and again, until you have enough braids to map/grid out your calendar days. (The point of this is just to have a bolder line to make the grid stand out well enough against the busy-ness of the design.)
Hot glue them in place on the design platform.
Using the burlap and felt, cut out a large enough rectangle (or whatever shape you want), to create a space to specify the Month.
Hot glue this to the design platform (as seen on the top left of my design platform).
(Cousin A also wanted space to write random notes, so I made a similar area to the top right of the calendar.)
Next, cut out small felt squares and hot glue in one corner of each day of the month (this will give you a designated space to number the days of the month).
Lastly, put the design platform back in the picture frame!
We made this one under a great deal of time restriction, so I got a little rushed with my yarn gluing, resulting in a slightly crooked calendar grid......but in this case, we'll just call it shabby chic!!!
Personally, I hate calendars, if you your a schedule freak, let those dates shine!!!


